How To Implement A Client - Server Architecture in MySQL

In a Client-Server architecture, two or more computers are connected together over a network to send and receive requests between one another.
A client-server DBMS comes in two parts. In the first part, the server usually resides on the machine as the database files and is responsible for all interactions with the database. The second part is the client; the client sends all database requests to the server which in turn processes the request and returns the results of the request back to the client.
MySQL client/server communication is not limited to environments where all computers run the same operating system.
Now, we let's set up a typical client-server architecture.
Requirements:
- 2 Ubuntu instances (One as a server and the other as the client)
For this tutorial, We'll be using an AWS EC2 instances.
STEPS:
- Create and configure two Ubuntu 20.04 virtual servers. Name them accordingly:
Server 1 name - mysql server
Server 2 name - mysql client
On MySQL Ubuntu Server install MySQL Server software.
On linux
serverinstance, install mysql server softwaresudo apt updatesudo apt install mysql-server -y- configure mysql by running a security script
sudo mysql_secure_installationsudo mysql - Create a dedicated user
project_userand grant privileges.CREATE USER 'project_user'@'%' IDENTIFIED WITH mysql_native_password BY 'password'; - Create a database named
testDBCREATE DATABASE testDB; - Grant pivileges to user on the database we created.
GRANT ALL PRIVILEGES ON testDB.* TO 'project_user'@'%';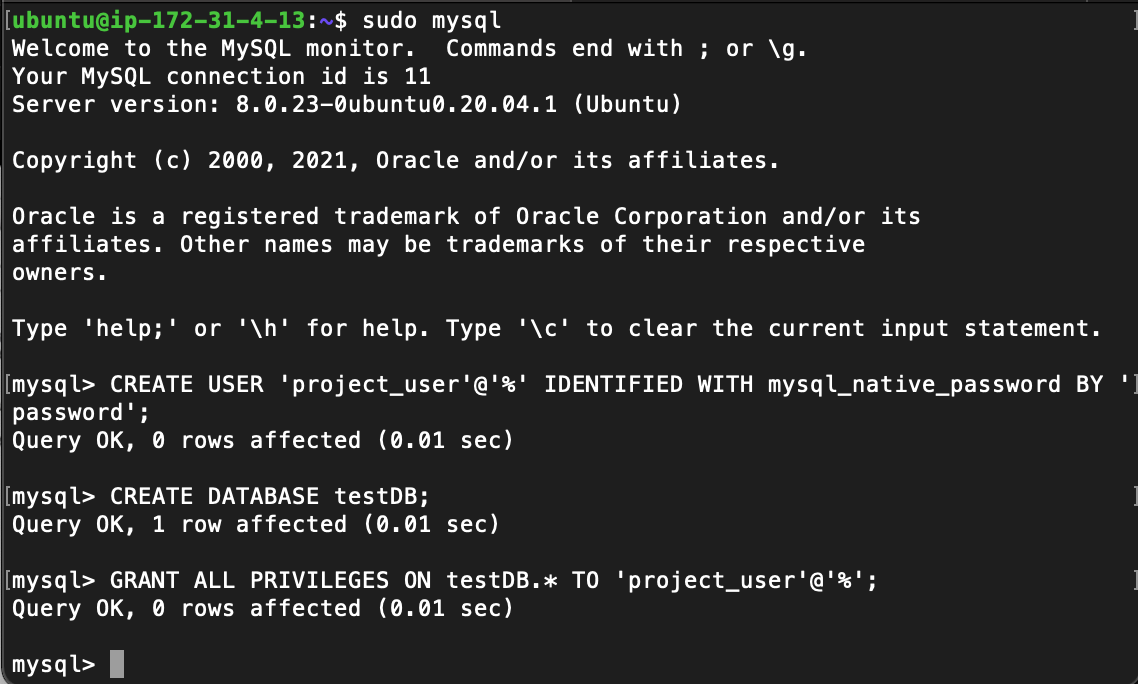
Install MySQL client software on client server
On
clientlinux instance, install mysql client softwaresudo apt updatesudo apt install mysql-client -yWe need to update our inbound security rules on the
serverinstance to accept only connections from ourclientserver. Under theconnection typewe selectMySQL/Auroraand for IP Address we use the client server's private IP addresss. This can be gotten by runningifconfigcommand on the client server.
Configure MySQL server to accept connections
- Run the following command to edit mysql-server connection settings.
sudo vi /etc/mysql/mysql.conf.d/mysqld.cnf - Search for
bind-addressand replace127.0.0.1with0.0.0.0save and exit - Restart mysql-daemon using
sudo systemctl restart mysqlConnect to MySQL server from MySQL client
- We can connect by running
sudo mysql -u project_user -p -h 172.31.4.13 - Enter mysql server password when prompted
- Run
SHOW DATABASES;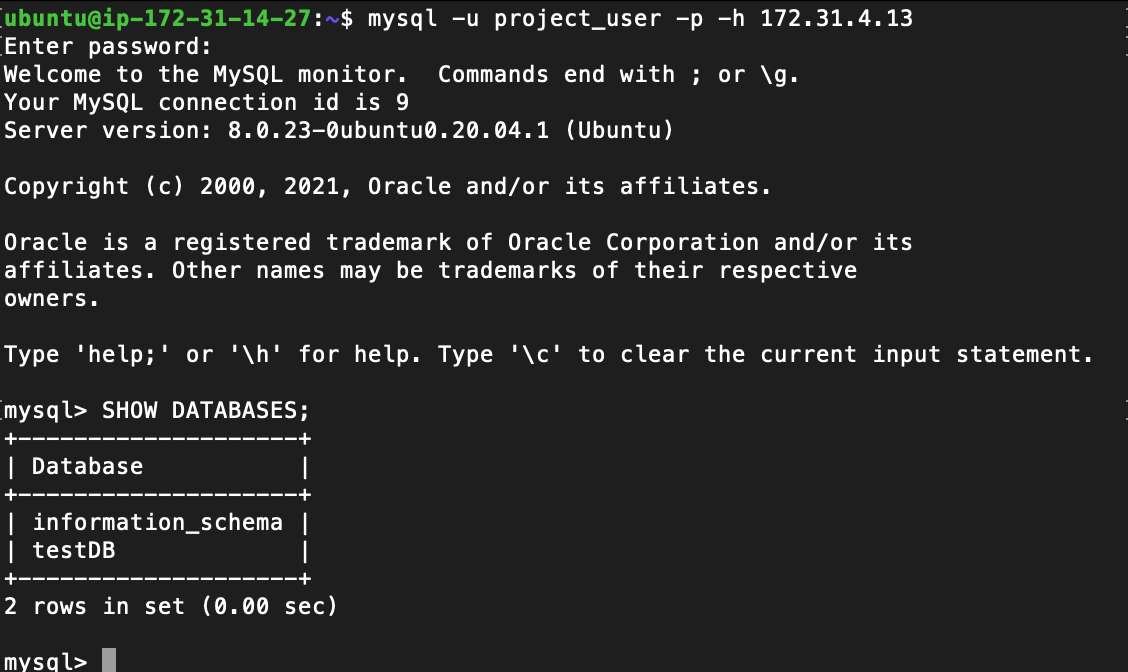
If you get an output similar to the above image, you have successfully deployed a fully functional MySQL Client-Server set up.